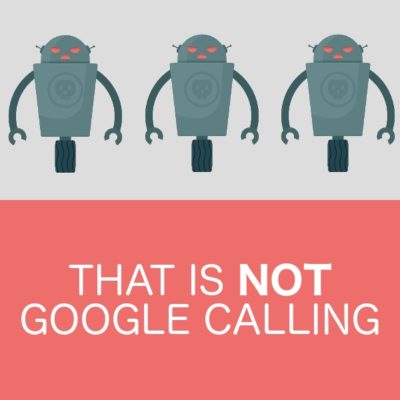
Google Robocalls: What To Do If You Get A Phone Call About Your Google My Business (GMB) Listing

100% of these calls are a scam, and here is what you need to do… Just hang up. For no reason should you give any personal information, or hire the caller to help verify or claim your business listing. The Google listing phone call is not coming from Google. Google does not call about listings. Read on to get all the details about these scam calls, and how to actually verify and update your Google business listing. But one last time, please understand — if anyone ever says they are calling you from Google they are LYING.
Sorry to harp on that point. Even when we explain this to clients, by the end of the talk they are asking what to do the next time their “Google rep” calls. And we have to say, yet again, that person is not working for or with Google. Far too often we hear of clients who have paid to some random company a subscription for services that Google offers for free. Again, the call is Not Google. There will never be an emergency or an urgent problem with the way that search results show your business info. If you ever feel pressured when it comes to Google, it’s a sign that someone is trying to con you. With that out of the way, let’s go over all the details you need to know about the Google My Business options. Click any of the links below to jump to the most important topic for you right now. And don’t worry — this article is for small business owners. So there will be no confusing tech jargon. Just simple explanations so you can protect yourself and understand how the local search directory works.

What A Google Listing Phone Call Scam Sounds Like

It could be a robocall asking you to press 1 to verify, or press 7 to be removed from a list (you won’t actually be removed). Or it could be an actual person who is “alerting” you that you are not showing up on Google, or that there is a problem with your listing. They might even say your listing is “scheduled for deletion” or “flagged for removal”. Finally, they could offer to sell you a “lifetime Google listing at a discount”. If you do not let them bamboozle you, and you ask some pressing questions, they will usually admit they are not Google, but may say they are “working with” Google. They’re not. These calls happen so often, that the actual support team from Google had to release a public statement. They gave a list of some things that they would NEVER do:
  • they don’t charge for inclusion in Google My Business or in Google Search
  • they don’t offer to improve your search ranking or manage your business’s online profile
  • they don’t ask you for your password or for a verification code
Any pressure or scare tactics you hear over the phone are meant to confuse you into taking action before you think it through.

What To Do If You Already Got The Google Phone Call & Are Paying For Help

First, don’t worry too much. These scammers are just trying to overcharge you for a simple service you could get for free, or that you could do yourself. So the worst thing that happened is you just over-paid for the “help”. You may even be on a monthly payment plan. If you try to cancel, the phone rep could try to scare you by saying that your site will drop out of the Google search, or some other bad thing will happen. It won’t. The first thing you should do is to remove their access from your page. Go here: https://www.google.com/business/ You may already be signed in on your computer. If not, you’ll need the email tied to your Google Account, as well as the password of your Google account. Here are the instructions to remove a manager from your Google listing: https://support.google.com/business/answer/3403100?hl=en Once you have removed any control this scammer may have, you can stop paying them. If they have you on recurring billing and will not stop it, call your credit card company to explain the situation.

What Is A “Google Partner”?

To further protect you, it helps to know some terms. There is a title called “Google Partner”.
This is a third party agency or marketer that took some basic online training and got a certification from Google. All it really means is that the agency / marketer has at least an entry-level understanding of how Google services work. It does not guarantee you (the small business owner) any results. So someone might call you and offer to help you show up higher in the search results for a specific phrase, or to run pay-per-click ads for you. They might let you know they are a Google Partner. As long as they don’t claim to be working with or for Google, or promising specific results, you can just weigh their offer versus the cost like any other service. We list some red flags for scammy SEO providers here.

View All Current Scams Involving Google

Here is an official list of all the scams done in the name of Google: https://support.google.com/faqs/answer/2952493 This list is updated each time a new scam happens. The robocalls we are discussing are under the heading “Google telemarketing calls”, but it is a good idea to be familiar with all the other scams out there right now.

How To Stop Google From Calling Your Business

Lots of people ask us if they can make (Fake) Google stop calling. So is there an easy way to fight back, or at least report these scammers? It’s not really worth your time. Hanging up and ignoring them is the best option. Even when they give you the option to press a button to “be removed from the list”, they will still call back. Don’t press any buttons when prompted! But if you feel like you need to do more, here are some options: 1. Get on the Do Not Call list in Canada / USA 2. Report a violation to Google But from our experience, after simply hanging up or telling them no a few times, they seem to move on. Of course, you can also block the number from calling you. However the scammers tend to use a bunch of different phone numbers all the time, so that doesn’t always work either.

Google My Business: What Is The Cost To Add, Claim, or Verify A Listing?

Free. It costs nothing to make or modify a Google listing. It does take a little time and patience, and a bit of know-how. Some business owners would rather just pay a pro to take care of it, to save themselves the energy. Simply put, the Google My Business listing is an easy way to show up on search results, help people find you on a map, show all your contact details and hours, and feature your customer reviews. It’s very useful for mobile searches as well.

Very Important — Pass This On To Your Friends

Now you know about the Google Listing Call Scam. Please be a responsible member of your local business community, and tell other small companies about it. Share this article on your Facebook or Twitter accounts, or email a link to friends that also run a business. You could save them some money, and a whole bunch of stress and worry. Think about it — it’s impossible to follow every change in technology, especially when you are so busy. We just need to help each other and to follow clear and honest business practices. Then everybody wins. Except the scammers… but, really, maybe even them, too. They’ll be forced to get a real job.
Read more...

Increasing the ROI of content marketing?

Great content marketing takes serious time and energy, and the cost can also become quite high. That’s why it’s important to keep the return on investment (ROI) as high as possible, so you actually get something in return for all your efforts. That “something” can be, for example, more traffic to your website or increased online sales. How to improve your ROI, that’s what we’ll dig into in this series of blog posts. Aim for position 0 in Google Position 0, also known as the featured snippet, is the text box that pops up in a Google search and gives you a direct answer to your search query. Research has shown that position 0 generates a whopping 114% more traffic to a website than position 1. Clearly, it’s well worth the battle! You’ll see the best results by using the right keywords. To help you in that area, you can use Textmetrics Content Ranking. That tool indicates whether you’re on the right track and offers you tips for improved keywords. Practical tips You might think that position 0 is only available to online giants like Wikipedia. It’s actually also up for grabs for your company or organization, but of course within search queries that are relevant to your business! To improve your chances of reaching this position, you can apply the tips listed below. Use questions to your advantage. It’s smart to use actual questions in your web text, like “How do I rank higher in Google?” and “How can I maximize the ROI of my content marketing?” Then you answer the question very briefly in the intro and expand on your answer in the body of the post. Are you a small business owner? Focus your efforts on local SEO, like “Where can I find a washing machine in Amsterdam?” or “How do I get to the closest café in Victoria?” Make sure to answer those questions briefly, just like in tip 1. Use keywords that already score high in other articles on your website. Not sure which ones those are? Try using the handy Content Ranking Index by Textmetrics. Run the Textmetrics Keyword Analysis to link the search queries related to your top keywords. That way you know exactly which searches rank highest in Google, allowing you to adjust your web copy accordingly. Position 0 likes things to the point and strong. The long pieces of web copy you use to explain a product or service won’t score you that ranking. That’s why it’s smart to create separate pieces of content containing about 54 to 58 words in total. Don’t forget about longer blog posts and articles altogether, since Google likes those, too. Make sure you include both styles on your website. Or make sure you have a main question followed by a short summary of a longer post. Columns, tables, rankings, lists… Position 0 loves those! Definitely use them in your content, just like we’ve done here. Make sure your articles and blogs are connected to related questions. Try explaining any jargon specific to your business on a separate page or come up with some questions that are linked to the topic of discussion in your article. Stay alert! Textmetrics Content Ranking Index will keep track of how you’re scoring in comparison to your competitors. That way you know exactly when it’s time to take action. Automation of SEO. Textmetrics offers the plug-in ‘SEO-editor’, which you can apply to your website (compatible with WordPress, Drupal, Joomla, SiteCore, and Word). It automatically ensures that your content is made Google-proof. Easy peasy, right? Use smart tools By applying the tips listed above, you’ll improve your chances of conquering position 0 in Google. But that can only work if your SEO basics are in place. Check to make sure that your website is completely optimized before even thinking of position 0. Make things easy on yourself, though, by using our Content Creation Engine and the Textmetrics Content Ranking. These smart tools make it much easier and a lot more fun to write great, discoverable, and Google-friendly content. Need more help than that? In this blog you’ll find more information. Whitepaper SEO Would you like to dig a bit deeper into SEO and how to best apply it to your website? You could, of course, dig through thousands of whitepapers about SEO, all available online. But if you lack the time and desire to do that, you can simply use the Content Creation Engine by Textmetrics. Just start writing, and our tool offers you tips to update your SEO along the way. Our team is always up-to-date, does take the time to read all the thousands of SEO whitepapers, and then integrates all that information into the Content Creation Engine. That way you can create great content quickly, without having to hit the books first. You can even have it check your “older” content. Copy and paste the existing copy into our tool to get advice about SEO. The tool will check the text against the latest rules and guidelines for Google and offer advice on that front. Implement the points of improvement, then paste the optimized text back into your website. It’s practically child’s play! .
Read more...

How to incorporate User Experience into Web Design and overall SEO Strategy Part 1 | Empathy and SEO Keywords

First we should consider, what is the focus of the user experience? Since the user is going to define your business with their experience more than any other aspect of your marketing plan, you should first assume that the focus is to ensure that your user's experiences meet "AT LEAST" your basic expectations of your business model. This means that in every aspect of your marketing approach, your user experience should become the focus of your efforts, not just conversions and sales.   Using this definition, let’s consider how best to ensure a quality user experience from start to finish.  The user experience has to start with empathy for what the user would wish to encounter in your digital business profile.  More and more digital customers want the same effort for an experience placed into digital media as they would expect for arriving at your business in person. For too many years, the marketing method of welcoming users to a site was to simply inundate them with data and articulate information.  While both are important, the same can be garnered using a billboard.  Instead, we need to consider how to welcome them to our sites, even if we are ranking the top for a keyword. (what is the point of ranking the highest if you also have the highest bounce rate?). So, we start with empathy: Why did this customer search this term? Choosing keywords needs to be user oriented.  For too many years, marketing director and SEO gurus have chosen keywords solely based on sales and conversions with little regard to additional reasons a customer may come to their site, as a result, the market has been marginalized when it comes to keyword targeting. Users are not completely satisfied with Search Engine Results now due to the mixed bag of outcomes in the results.  Much of this is the fault of our SEO Strategies that have pushed businesses to the tops of search results by providing the best answer in text, even when they may not be the “best answer” in reality.  This has caused the modern consumer to become less and less impressed by search engine placement. Don’t get me wrong, local services and immediate need sales are still in vital need of top placement in the search engines, but the non-immediate purchases are becoming more and more thought based. Local searches for plumbers will certainly still benefit from the top listing in organic and map, but what about for their non-emergency sales?  The searching customers not requiring an impulse purchase are becoming more reliant on user investigation and “purchase assurance” than just the need to address the issue in the easiest way possible. As a society, we are becoming more diligent about the items we individually care most for, and as a result, our marketing methods have to shift to accommodate for digital narcissism. We are obsessed with the desire to garner the attention of our fellows and become recognized as individual “truth givers” and “knowledgeable people” to our fellows. People inherently work for the acceptance of others, and with the advent of the digital age, people have begun basing self-worth and assessment on how others view their ability to be knowledgeable resources of data and information.  As a result, you should start by considering what the individual will be looking for to satisfy that internal need and proceed with a marketing strategy that incorporates this knowledge. Google coined the term the “0” Moment marketing Truth, I would go to say that this is the precursor to it. Empathizing and breaking down the average user to his core understanding has to come first. Doing so allows us to choose keywords based off of what the user actually wants in the way of an experience, not just what we wish to sell them. There are many deeper aspects to this line of thought.  Next, we will discuss why finding the customer/visitors interests before they do is a vital use of this empathy and the next step in your User Experience Based marketing strategy.
Read more...

5 SEO Tips for Launching a New Website and New Brand

You may feel that you have the perfect search strategy, but there are still more tactics to consider. Here are some basic SEO tips for launching a new website and new brand: Rebuilding a Website
  •      As you transition from your old website to a new SEO targeted Website, you can maintain the link equity in which you have invested in already. This is vital for getting your new website to rank quickly. The most effective way to achieve this would be to leave your URLs untouched. However, this is not always possible y if you make an attempt to improve your URL structure or moving to a new domain. Often, updating to a strong Database Built Web Design will result in some changes to link mapping.
  •     Images are ideal to make your new website engaging and attractive. Unfortunately, search engines have not reached a point yet where they can decode content that is image-based. The use of alt tags can enable search engines to comprehend the meaning of images; this can also be valuable for those who are visually impaired. Alt tags should be vivid and entail the same keywords for which your page aims to rank.
  •      External links can enable link authority to your website, while internal links can distribute that particular authority across your website pages. In page cross-linking, there are opportunities for appropriate referrals to additional pages with relevant data; they are typically unheeded during a redesign. Page copy can be an ideal place to link to deeper website pages with anchor text to point to long-tail keywords.
  •    Local results have taken a greater standing in the SERPs. Naturally, it depends on your brand; so, local can be your strategy instead of a small portion of your overall plan.  Keep in mind, locally focused works only if your business model is only focused locally. There are several locally relevant recommendations to consider in combination with your fresh new website launch, but most importantly, your maps should always be the focus of local SEO. Our Naperville Web Design and SEO Team targets citation listings (map directories) and locally relevant review sites to ensure for a cohesive and universal set of data descriptions.
  •      A new Google search feature in authorship is expected to increase in relevance over time. Author-Ranking is the future of authorship where pages are ranked based on the authority of the writer, as opposed to the authority of the page/website. An investment in authorship can help you not only in the short term, but the long term as well. We suggest that your content creators work on and off of your sites to develop a stronger authorship ranking.
To find out more information about how SEO can help improve your web visibility, contact our Chicago and Naperville SEO Team.
Read more...

40 Superb Photoshop Tutorials For Attractive Photo Effects

By Obaid ur Rehman Photoshop is the basic requirement of a designer and that’s why designers all around the world regularly look for the tutorials that can help them in polishing their Photoshop skills. Since the demand for Photoshop tutorials is too high these days, we prepared a post that can truly help you in achieving amazing results with your Photoshop skills.

Photoshop Tutorials for Attractive Photo Effects

Graceful Lady In The Dark In this tutorial you will find some of best technique to beautify your photos. Th Photoeffect3 in 40 Superb Photoshop Tutorials For Attractive Photo Effects The Colors Of Love In this tutorial you will learn some great tips to modify your photographs. Th Photoeffect4 in 40 Superb Photoshop Tutorials For Attractive Photo Effects Simple Make Up In this tutorial, shows you how to enhance your normal potrait photo into beautifully fair skin and well done makeup, plus shiny healthy hair just like what you see on tv. Th Photoeffect11 in 40 Superb Photoshop Tutorials For Attractive Photo Effects Easy composition but nice result This photoshop tutorial will be very useful for the beginners. Th Photoeffect2 in 40 Superb Photoshop Tutorials For Attractive Photo Effects Impressive Photo’s Background In this tutorial you will find some of best technique to beautify your photos. Th Photoeffect5 in 40 Superb Photoshop Tutorials For Attractive Photo Effects Adding Light Streaks To A Photo how to add colorful streaks of light to a photo. Th Photoeffect6 in 40 Superb Photoshop Tutorials For Attractive Photo Effects How to create Glowing Fashion Photo Manipulation how to create a glowing fashion photo manipulation using Photoshop techniques, starting from a basic model shot. Th Photoeffect7 in 40 Superb Photoshop Tutorials For Attractive Photo Effects Creating a Vector Composite Effect from a Photo how to take an image, in this case a woman’s face, and give the appearance that it is entirely composed of vector shapes. Th Photoeffect8 in 40 Superb Photoshop Tutorials For Attractive Photo Effects Selective Sepia how to use Photoshop to create selectively add a dramatic sepia effect a photo. This Photoshop effect works best when used with Photoshop CS3 but will also work with Photoshop CS2 or older using an alternative method. Th Photoeffect9 in 40 Superb Photoshop Tutorials For Attractive Photo Effects Hot & Fiery Photo Effect how to create a photo effect like the one in the below image, it’s pretty much all accomplished by using Filters, as are most photo effects, right? Photo manipulation on the other hand uses many tools of the trade, most commonly “airbrushing”, as everyone calls it. Th Photoeffect10 in 40 Superb Photoshop Tutorials For Attractive Photo Effects Creative Photo Of A Bride In this tutorial you will find some of best technique to beautify your photos. Th Photoeffect11 in 40 Superb Photoshop Tutorials For Attractive Photo Effects Adding Reflections To Sunglasses In Photoshop how to add reflections, or at least, different reflections, to sunglasses. Th Photoeffect12 in 40 Superb Photoshop Tutorials For Attractive Photo Effects Beautiful Lighting Effect In this tutorial you will learn some great tips to modify your photographs. Th Photoeffect13 in 40 Superb Photoshop Tutorials For Attractive Photo Effects Create a photoshop mermaid image manipulation how to create your very own water splash techniques using only Photoshop, and you’ll learn how to customize brushes that are essential to this effect’s success. Th Photoeffect14 in 40 Superb Photoshop Tutorials For Attractive Photo Effects Remove-freckles In this Photoshop tutorial, you’ll learn how to subtract freckles using a layer. This process provides the most natural results for light-brown freckles (ephelides) but will not work for dark freckles (lentigines). Th Photoeffect15 in 40 Superb Photoshop Tutorials For Attractive Photo Effects Airbrushing – Natural Smooth Skin In this tutorial you will teach you an effective Photoshop technique to simulate airbrushing without losing the texture. Th Photoeffect16 in 40 Superb Photoshop Tutorials For Attractive Photo Effects Photo retouching In this tutorial we are going to practice some amazing Photo effects using Wacom tablet. Of course you will be able to do it with PC mouse. Th Photoeffect19 in 40 Superb Photoshop Tutorials For Attractive Photo Effects Thermal Photo Effect how to convert your photos into Thermal Photo Effect. Th Photoeffect20 in 40 Superb Photoshop Tutorials For Attractive Photo Effects Glamour Model how to retouch a face’s photo and make from a simple picture a very original one. Th Photoeffect23 in 40 Superb Photoshop Tutorials For Attractive Photo Effects Retouch A Girl with Lighting Focus how to use lighting effect to emphasize her face, skin and hair. Th Photoeffect24 in 40 Superb Photoshop Tutorials For Attractive Photo Effects Star Diffusion This Photoshop effect creates diffusion in the shape of a four point star and is an ideal effect for portraits or any photos with a strong background blur. Th Photoeffect27 in 40 Superb Photoshop Tutorials For Attractive Photo Effects Galaxy Angel how to retouch the skin of a model, imitate the make-up, draw the tattoos, represent the hair out of the smoke, use different textures, represent the clouds and insert the wings on the picture, enlarge the background the model is situated on, not cutting it out and create the effect of an old picture, at least on its edges. Th Photoeffect30 in 40 Superb Photoshop Tutorials For Attractive Photo Effects Add Dynamic Lighting to a Flat Photograph how to spice up a fairly dull and flat photograph. Th Photoeffect31 in 40 Superb Photoshop Tutorials For Attractive Photo Effects Create a Funky Perspective of a Model Riding Digital Volume how you can achieve the feeling of depth and motion.creating the volume fading away and adding foreground and background images. Th Photoeffect32 in 40 Superb Photoshop Tutorials For Attractive Photo Effects Add Cool Fireworks to the Photo If you are interesting in pyrotechnics then this tutorial special for you! Th Photoeffect33 in 40 Superb Photoshop Tutorials For Attractive Photo Effects Create an Artistic Photo by Yourself Here is not so hard, but very interesting tutorial how to make an artistic photo. Th Photoeffect34 in 40 Superb Photoshop Tutorials For Attractive Photo Effects Old Style Photo Effect how to create old style photo effect with interesting accent. Th Photoeffect35 in 40 Superb Photoshop Tutorials For Attractive Photo Effects Make Up Effect for the Face In this tutorial you will find some of best technique to beautify your photos. Th Photoeffect36 in 40 Superb Photoshop Tutorials For Attractive Photo Effects Coloring Effects In this tutorial you will learn some great tips to modify your photographs. Th Photoeffect37 in 40 Superb Photoshop Tutorials For Attractive Photo Effects Fantasy Art In this tutorial you will find some of best technique to beautify your photos. Th Photoeffect38 in 40 Superb Photoshop Tutorials For Attractive Photo Effects Make Perfect Selection for Human Object by Utilising Channel Mask Technique in Photoshop In this tutorial you will learn some great tips to modify your photographs. Th Photoeffect39 in 40 Superb Photoshop Tutorials For Attractive Photo Effects How to Turn Humdrum Photos into Cinematic Portraits how to transform usual photo into regular, humdrum portrait, even faking HDR effects a little bit. Th Photoeffect40 in 40 Superb Photoshop Tutorials For Attractive Photo Effects How To Create A Neat Bird House From Scratch In this tutorial to create your own “Bird House”, just read the steps carefully, and you’ll be surprised how easily this can be achieved with Photoshop Th Photoeffect43 in 40 Superb Photoshop Tutorials For Attractive Photo Effects Adding Light Streak how to add light streak into a photo. Th Photoeffect44 in 40 Superb Photoshop Tutorials For Attractive Photo Effects Reducing 5 O’Clock Shadow And Beard Stubble In Photoshop how to reduce the appearance of 5 o’clock shadow and beard stubble in a photo. Th Photoeffect45 in 40 Superb Photoshop Tutorials For Attractive Photo Effects Retouching a Studio Portrait how to enhance backgrounds, dodge and burn, brighten eyes, and add hair shine while keeping a low count of layers. Th Photoeffect46 in 40 Superb Photoshop Tutorials For Attractive Photo Effects Dream Photo Effect how to create dreamy effect in your photographs. Th Photoeffect47 in 40 Superb Photoshop Tutorials For Attractive Photo Effects Create a Beautiful and Dramatic Scene With Photo Manipulations how to combine two pictures to create a picturesque background, how to draw long hair manually using Photoshop brushes, as well as how to add some adjustment layers to add dramatic effects to the final image. Th Photoeffect48 in 40 Superb Photoshop Tutorials For Attractive Photo Effects Super Fast and Easy Facial Retouching how to repair some image noise from a low-quality shot The woman in this shot is not a model, and she has a lot of character so you don’t want to overdo it with the smoothing. Th Photoeffect49 in 40 Superb Photoshop Tutorials For Attractive Photo Effects Quick and Effective Facial Photo Retouching Here’s another method for quick and easy facial retouching. Th Photoeffect50 in 40 Superb Photoshop Tutorials For Attractive Photo Effects Achieve Brilliant Lighting Effects in Photoshop Lighting effects can make or break any digital artwork. When done properly, lighting can add visual impact, draw the viewer’s eye, convey depth and emotion, and tie together all the elements of the piece for a quality finished result. Th Photoeffect51 in 40 Superb Photoshop Tutorials For Attractive Photo Effects
Read more...

Best of Tuts+ – April

April was an enormous month for Tuts+. In one month Tuts introduced Creative Sessions, teaching the theory behind the techniques and practices that get used in tutorials and by professionals in the field. We also saw Cgtuts+ and Activetuts+ commence their Premium Programs and introduced Moneybookers as an alternate payment method, for those who don’t have PayPal. On top of that we also introduced Pre-paid memberships so if you don’t have a credit card, you can still become a Premium Member. Here’s a selection of the best from each site, just in case you missed it amongst all the action.

Psdtuts+ – Photoshop Tutorials

  • How to Create an Incredible Typographic Illustration – Part 1

    All work and no play makes Jack a dull boy. In this two-part tutorial, we’re going to learn how to bring a simple proverb into a complex typographic illustration that achieves a level of realism without actually using any photos. Yes, we’re going to build this idea from the bottom up. In the first part, learn how to model your own objects in Cinema 4D and prepare them for isolation in Photoshop. Continue Reading
  • Give a Photo a Complete Glamour Makeover With Stunning Light and 3D Effects

    Have you ever wanted to see what you would look like after a complete makeover? Today, I’m going to show you how to transform a regular, every day photo into a real glamour shot. In this tutorial, you will learn how to retouch a model’s face and subtly manipulate her hair. In addition, we will enhance the canvas by adding attractive lighting and 3D effects. This tutorial requires considerable Pen Tool skills, but with perseverance and a passion for design, you will certainly be able to achieve great results. Continue Reading
  • Create an Angelic Sculpture Made of Ice in Photoshop

    Sometimes all you need to create an incredible photo manipulation in Photoshop is a rough sketch, some nice imagery, and some knowledge of how to use Photoshop’s transformation tools. In today’s tutorial we will demonstrate how assemble an angelic ice sculpture from a rough sketch and some beautiful scenic photos. Continue Reading
  • Turn a Flawless Blonde Beauty Into a Sword-Wielding Fantasy Action Hero

    In today’s tutorial we are going to turn a flawless blonde beauty into a sword-wielding survival huntress. To do this we are going to make her skin sweaty and dirty, her dress stained and torn, we’ll add blood stains to the sword, manipulate her hair, and create a post-apocalyptic background full of smoke and fire effects. It’s gonna be a gas! Continue Reading
  • Quick Tip: Create a Realistic Paper Texture in 5 Minutes

    In this quick tip tutorial, we will learn how to create a realistic paper texture from scratch in just 5 minutes. To do this we will use some simple filters and effects. Let’s get started! Continue Reading

Activetuts+ – Flash, Flex and ActionScript Tutorials

  • Exclusive Freebie: The Piecemaker XML Gallery

    To kick us off in style, here’s the awesome Piecemaker gallery created by Björn from Modularweb. Besides the freebie, you’ll find extensive documentation and a tut explaining the native 3D features of Flash CS4. Over to you, Björn.. Continue Reading
  • A better way to build flash banners

    A Better Way to Build Flash Banners

    Banner development is often plagued by multiple files, fragmented code and messy timelines. This tutorial will show you how you can create a project template to serve as a solid base which will help you develop robust banners quickly, freeing you up to focus on bringing the creative idea to life. Continue Reading
  • How to Create a Flash Menu in 20 Minutes

    How to Create a Flash Menu in 20 Minutes

    Imagine you’ve promised your client he will have that menu idea you told him about later on today, when you meet. You open up Flash and begin a rough but great example, which you can code or extend later. During this tut we’ll focus on making just such a menu; as customizable as possible, without using any classes, just component parameters. Read More
  • Quick Tip: How to Automatically Resize an Image to Fit the Screen

    Quick Tip: How to Automatically Resize an Image to Fit the Screen

    This Quick Tip explains how to use an image as a website background and scale it proportionally to the stage size. It’s great for when you’re using a SWF that’s full-height and full-width inside a webpage. Read More
  • Throw Objects by Creating a PanAndThrow Class

    Throw Objects by Creating a PanAndThrow Class

    In this tutorial we will be mocking up and finishing a pan and throw class that will allow us to add this effect to any element we want. To accomplish this, we will create a image viewer – but not your average viewer. Here we’ll have zooming, throwing, panning.. Almost sounds like a ninja app, huh? Visit Article

Aetuts+ – Adobe After Effects Tutorials

  • Discover How To Recreate the Sherlock Holmes End Credits Effect

    Discover How To Recreate the Sherlock Holmes End Credits Effect

    After Effects, my dear Watson! This tutorial uses hand drawn elements, textures, and pre-matted motion elements to recreate a look that is similar to the Sherlock Holmes credits. It gives you basics to build on. The great thing about this effect is that it is made to look organic and not 3D and effects heavy, but it still turns out looking really professional. It does not require very much expertise in free hand drawing seeing that all you have to do is trace a still image. Take this tutorial and build upon it to create something awesome. Visit Article
  • Create A Realistic Glass Reflection

    Create A Realistic Glass Reflection

    Transparency is an important element to reflect in one’s relationships and if we can help you in that area it’d be our pleasure! In this tutorial you’ll find out how to create a realistic glass reflection on a 3D object, created within After Effects. We’ll then simulate a normal pass and have it reflect the environment with the “normality” free plug-in. Visit Article
  • Get Caught Up In A Spider Web Tutorial – AE Premium

    Get Caught Up In A Spider Web Tutorial – AE Premium

    Learn how to use Trapcode Form to create a stylistic and dynamic Spider Web. This tutorial will show you how to “think outside the box” when it comes to using plug-ins to get away from that “preset” look. Visit Article
  • Welcome CS5! An Intro To The New “Roto Brush”

    Welcome CS5! An Intro To The New “Roto Brush”

    A HUGE welcome to After Effects CS5! In this tutorial, I’ll be going through and explaining the new “Roto Brush” tool included within CS5. It isn’t a “keyer”, it’s not quite a “magic wand”, I wouldn’t even call it a “pen”. You’re just gonna have to watch the tutorial to find out what this amazing new feature is made of! Visit Article
  • 61 Mesmerizing VFX Breakdowns

    61 Mesmerizing VFX Breakdowns

    A subject we haven’t touched on for a couple months is the wonder of visual effects and compositing breakdowns. Take a look at the largest roundup of this genre to date! Visit Article

Audiotuts+ – Audio and Production Tutorials

  • Quick Tip: How to Create Interesting Drum Patterns Quickly

    Quick Tip: How to Create Interesting Drum Patterns Quickly

    Here is a quick and effective way of creating original and complex drum patterns spontaneously. I am using Logic, but the concept is not DAW specific. Visit Article
  • How To Recognize Frequencies

    How To Recognize Frequencies

    In the last installment we studied the first four octaves of the frequency spectrum with pink noise. Now we’ll continue with the rest of the octaves and revisit the others using music samples. Visit Article
  • 6 Apps & Websites to Get Your Ear in Shape

    6 Apps & Websites to Get Your Ear in Shape

    If you followed along with us a few weeks ago, you know how much interval ear training can help you as a musician and how to get started with training itself. If you haven’t read it, head on over to Boot Camp for Your Ear. This time, we’re going to look at a bunch of applications and websites that will help you with regular ear training sessions. Most of these go beyond intervals, of course. Visit Article
  • 8 Free, Cross-Platform Apps for Musicians

    8 Free, Cross-Platform Apps for Musicians

    Like most of us when we’re in the studio, it’s hard to get me to work with anything other than the industry standards; Pro Tools, Reason, Logic (which sort of falls into that category), and so on. But given the rising prices of just about everything under the sun, not to mention the chronic emptiness of the musician’s wallet, it’s worth taking a look at the alternatives out there that can be had for free. Visit Article
  • Basix: How to Record the Acoustic Guitar

    Basix: How to Record the Acoustic Guitar

    Recording acoustic instruments can be scary for beginners. In this day and age many people just plug in and play their instruments, electric guitars, basses and synths, never needing to record an instrument except the odd vocal track. True as it may be that we get better sounds out our guitar plug-ins and software synths with every update, we must not forget how to record a “proper” instrument, in the real world. Visit Article

Cgtuts+ – CG and 3D Tutorials

  • An Archiviz Workflow Overview in 3ds Max, Sketchup, and Digital Fusion

    An Archiviz Workflow Overview in 3ds Max, Sketchup, and Digital Fusion

    In this Architectural Visualization workflow overview you will learn how to use Google Sketchup for photo matching, create a Vray-proxy in 3ds Max, use Max script to speed up your workflow, reduce render times when creating a large scene, set render layers in 3ds Max, and do some post production in Digital Fusion. Visit Article
  • Model, Texture, and Render the Legendary Katana in Maya – Day 1

    Model, Texture, and Render the Legendary Katana in Maya

    In this 3 part Maya workflow tutorial you will learn how to model, texture, and render a Katana, the legendary Samurai sword. For the modeling portion, we will use Maya’s basic polygon editing tools, while UVlayout will be used to create the UVs, and of course Photoshop to create the textures. We will also briefly cover Mental Ray for rendering the final image. Visit Article
  • Create Convincing Looking Clouds using Pyrocluster in Cinema 4D

    Create Convincing Looking Clouds using Pyrocluster in Cinema 4D

    This tutorial will demonstrate the ease and versatility with which you can create convincing looking gas effects using Cinema 4D’s Pyrocluster. You will learn how to optimize your scene and tune it to your own visual tastes, while focusing on creating realistic clouds as the subject matter. The basic techniques, however, can be applied to a variety of different scenarios and effects. Visit Article
  • Create a Logo Dispersion Effect using Particle Flow and After Effects

    Create a Logo Dispersion Effect using Particle Flow and After Effects

    As you may know, when you get a grasp on particles in CG, the possibilities of what you can accomplish are nearly limitless. In this 3ds Max based Particle Flow tutorial, you will learn an easy method of dispersing a logo into particles using materials. Visit Article
  • Quick Tip: Simulating Chains using Reactor in 3ds Max

    Quick Tip: Simulating Chains using Reactor in 3ds Max

    In this short tutorial, you will learn how to simulate chains, necklaces, or pearls using an easy and very efficient method with reactor in 3ds Max. After watching this, you will be able to simulate chains in just a few short seconds, a skill which can prove to be very useful in countless different situations. Visit Article

Nettuts+ – Web Development Tutorials

  • Quick Tip: HTML5 Features you Should be Using Right Now

    Quick Tip: HTML5 Features you Should be Using Right Now

    With all this talk about HTML5 not being complete until 2022, many people disregard it entirely – which is a big mistake. In fact, there are a handful of HTML5 features that we can use in all our projects right now! Simpler, cleaner code is always a good thing. In today’s video quick tip, I’ll show you a handful of options. Visit Article
  • Combining Modern CSS3 and HTML5 Techniques

    Combining Modern CSS3 and HTML5 Techniques

    Just because some techniques don’t work in decade old browsers doesn’t mean that you shouldn’t be learning everything you can! Stay on the cutting edge, as we use everything from CSS shadows and animations, to HTML 5 mark-up and local storage, to utilizing jQuery to work with the Picasa API. We’ll also take advantage of the excellent jQuery library, and review some best practices when coding. Visit Article
  • Quick Tip: An Introduction to jQuery Templating

    Quick Tip: An Introduction to jQuery Templating

    JavaScript Templating is a neat idea: it allows you to easily convert JSON to HTML without having to parse it. At Microsoft’s MIX10 conference, they announced that they are starting to contribute to the jQuery team. One of their efforts is to provide a templating plugin. In this quick tip, I’ll show you how to use it! Visit Article
  • 10 Kick-Ass Magento Templates

    10 Kick-Ass Magento Templates

    I’m proud to announce that ThemeForest is now selling Magento eCommerce templates at cheap prices that any business or individual can afford. We’ve launched with thirty-five awesome Magento templates, but we’re just scratching the surface. By the end of the year, ThemeForest will be the premier location for buying and selling Magento templates! Here are some of the best that we’ve launched with. Visit Article
  • Quick Tip: Notable New Features in Dreamweaver CS5

    Quick Tip: Notable New Features in Dreamweaver CS5

    If you’re a Twitter user, it was difficult not to be aware of Adobe’s CS5 global launch presentation. While they did an excellent job of promoting Photoshop and Flash, other applications, such as Dreamweaver, only received limited coverage. Nonetheless, take a look at some of the awesome new features in Dreamweaver CS5, slated to be released in mid-May. Visit Article

Phototuts+ – Photography and Post-processing tutorials

  • Advanced Macro and Still Life Photography

    Advanced Macro and Still Life Photography

    You face special challenges when shooting objects that are close-up, or capturing still life. As with most subjects, many of these challenges have to do with light quality and quantity. With macro photographs, the challenge grows as the subjects get smaller. This article delves into designing for still-life and macro photography, outlines high and low-key techniques, and discusses the importance of depth of field. Visit Article
  • Quick Tip: 5 Useful New Features in Adobe CS5

    Quick Tip: 5 Useful New Features in Adobe CS5

    Today marks the launch of the latest edition of Adobe’s Creative Suite – CS5. In today’s Quick Tip, we’ll be taking a look at a few of the new features in Photoshop CS5 that are particularly useful for photographers. We’d also love to hear what you’re looking forward to, and whether you’ll be upgrading! Visit Article
  • Simple Steps for Shooting Amazing Silhouettes

    Simple Steps for Shooting Amazing Silhouettes

    Silhouettes can be an excellent way to add drama to a scene. The stark contrast and lack of detail in the subject infuse a psychological effect into the image that can be beautiful, mysterious, or even frightening. Today we’ll look at a few suggestions to keep in mind the next time you set out to shoot some silhouettes. We’ll also examine the settings used in some real-life amazing silhouette shots to see what we can learn from them. Visit Article
  • The Almighty Histogram – Your Guide to Better Exposure

    The Almighty Histogram – Your Guide to Better Exposure

    In this tutorial you’ll learn about the histogram, and what it’s able to tell you about your photography. If you’re going to use the back of your camera as guide to judging exposure, then you need the histogram. Understanding it fully will help you capture better, more flexible images! Visit Article
  • The Ultimate Guide for Buying Your First Digital SLR

    The Ultimate Guide for Buying Your First Digital SLR

    Let’s assume that you’ve been shooting with your “point and shoot” for a while now, and you’ve taken some pretty nice snapshots. But maybe you are starting to feel a little limited by what the camera is capable of doing. You’ve read up on photography, and there are things you want to work on. You feel it is time to step up! This guide will help you to understand some of the basic features of Digital SLR cameras (DSLRs), and hopefully help you find one that fits both your needs and budget. Visit Article

Vectortuts+ – Adobe Illustrator and Vector Tutorials

  • Time-Savers: 400+ Stock Images, Retro Vectors

    Time-Savers: 400+ Stock Images, Retro Vectors

    Stock images can save you many hours of work on illustration and allow you to focus your attention on the important task of designing. Finding the right vector for you, however, is a completely different matter, and can sometimes take just as long as creating a vector image yourself! That’s why in this post we have rounded up a total of over 400 retro-themed vector images which you can use in your own projects. Visit Article
  • How To Create Outstanding Modern Infographics

    How To Create Outstanding Modern Infographics

    Merge form and function to create outstanding modern infographics. In this tutorial you will learn that data doesn’t have to be boring, it can be beautiful! Learn how to use various graph tools, illustration techniques and typography to make an accurate and inspiring infographic Visit Article
  • Inspiration: Amazing 3D Typography

    Inspiration: Amazing 3D Typography

    Three-dimensional typography is something we’ve seen a lot of recently, and it doesn’t seem to be dying down, either. This post showcases a huge collection of 3D typography, and we have no doubt whatsoever that it is going inspire! Visit Article
  • Quick Tip: The Tilde Key Trick

    Quick Tip: The Tilde Key Trick

    This screencast covers fun with the Tilde key and Adobe Illustrator. Works with any Shape Tool, the Line Segment Tool, the Arc Tool, the Spiral Tool, and more. Use this technique to quickly make complex shape patterns. Visit Article
  • Create a Realistic, Vector Building Illustration

    Create a Realistic, Vector Building Illustration

    We have another great Vector Premium tutorial available exclusively for Premium members today. If you want to learn how to create realistic vector buildings, then we have a massive and extremely detailed tutorial for you. Visit Article

Creative Sessions

  • The Elements of Cute Character Design

    The Elements of Cute Character Design

    You’ve always wanted to develop a character which has the potential to enchant the world and to compete with Hello Kitty? In this article I’d like to present some elements making a character cute and lovable and to support you in achieving your goals. First, I talk about why something is regarded as cute. Afterwards I’d like to offer an overall view on cute proportions and as a conclusion consider general rules and tips. The goal is to create a manual of cute character design which can be universally used in the process of design. Visit Article
  • Roughly Speaking: Character Design Sketching Approaches

    Roughly Speaking: Character Design Sketching Approaches

    Character design comes in many styles, but they all start with the rough sketch. Often overlooked in online tutorials, technique and process videos, they are the foundation to creating quality characters. The following is an overview of rough sketches from some fantastic character design artists, with many different styles and approaches. Visit Article
  • Character Design – Nailing the Basics

    Character Design – Nailing the Basics

    If you’re thinking of becoming a professional illustrator, character design will come up as a client request again and again, so keeping up on current trends is a must. To get started creating your own characters, you’ll need to nail the basics, which includes: getting comfortable sketching, refining your process, and streamlining your overall approach. Visit Article
  • Creating Personal Character Designs with Precision

    Creating Personal Character Designs with Precision

    Designing a character can apply to both personal and professional projects. The character can be a mascot that works in the context of a multi-national brand, or it can simply be inspired by a well-known character within pop culture. The later is usually referred to as “Fan Art.” The character “Mickey Rat” first appeared in the early 1970’s as a subversive underground comic that I enjoyed as a kid. Many artists over the years have taken their own approach with the character, and this article goes over my creation of this vectorized vermin. Visit Article
  • How to Make an Animated Paper Robot

    How to Make an Animated Paper Robot

    In this tutorial we’ll go through the steps of designing and making an animated paper robot character. Not just a picture, this is a moving character that will sit nicely on top of your computer monitor. Push the robot body up and down and he stretches out his robot claws! We’ll start with the lines ready and learn the craft of coloring and then physically putting this paper character together.. Visit Article

FreelanceSwitch

  • Keeping In Touch with Prospective Clients

    Keeping In Touch with Prospective Clients

    A lot of your success as a freelancer will depend on your persistence. It takes many forms – your persistence in learning and improving your skills, the persistence that’s involved in bringing a long, difficult project to completion, and the topic of this article, persistence in keeping in touch with the people who may do business with you. Visit Article
  • Turning Your Knowledge into Products

    Turning Your Knowledge into Products

    One of the big downsides of the freelance world is that when you’re not doing billable work, your income goes to zero. So, there’s a lot of talk about creating income streams that aren’t dependent on your selling your time. Visit Article
  • Why I Believe in Pricing Work Based on Value

    Why I Believe in Pricing Work Based on Value

    For freelancers, the question of how to price your services is always up for debate. Should you charge by the hour or per project? What should your hourly rate be? What type of payment terms should you require? The answers to these questions will vary based on your industry, your reputation, and your personal preferences for your business. But there is one thing that I believe should factor into every pricing decision you make: Price your services based on value. Visit Article
  • Setting Your Standards as a Freelancer: A Few Suggestions

    Setting Your Standards as a Freelancer: A Few Suggestions

    Having standards is important when you’re trying to find and work with clients on your own. It’s surprisingly tempting not to stick to your standards: a quick project that you wouldn’t normally take can look pretty appealing if you’re having a slow month. But sticking to your guns can be important in more ways than one. If you take that problematic job, not only are you doing something that you don’t want to do, but you’re also likely to hand in work that you know isn’t as good as you could do. Even worse, that sub-standard job can take up the time you need to find higher paying clients, sticking you in a position where you can’t afford to move forward. Visit Article
  • Get Business Buzzing with a Buzz Piece

    Get Business Buzzing with a Buzz Piece

    Most business models can attest to the power of a buzz piece. This marketing tool provides valuable information for prospective clients, the ability to transform readers into customers and a ton of exposure. So if you don’t have one, you should absolutely consider it. Here’s what you need to know about buzz pieces. Visit Article
We’ll be publishing the best of Tuts+ each month, so you get to see the best of everything.
Read more...

Create a Chalkboard Icon Using Photoshop and IconBuilder – Screencast

In today’s screencast we will review a tutorial originally written by author Leslie Nayibe. Leslie’s tutorial demonstrated some of the fundamental processes of creating an icon in Photoshop. Today, we will be recreating that tutorial in video format.   View the written version of this tutorial Create a Chalkboard Icon Using Photoshop and IconBuilder
Read more...

Fabric Inspired Grunge Brushes – Premium Psdpack

Today, we have a new set of Premium Brushes available for Psd Premium Members. This set was crafted by Grant Friedman of Colorburned and includes 20 high resolution fabric inspired grunge brushes. If your next project calls for a grungy fabric inspired look, then this set is perfect for you. Learn more at the jump!


New Fabric Inspired Grunge Brushes

This new Premium Psdpack Pack is available for Psd Premium Members today and includes 20 high resolution brushes ranging somewhere in the neighborhood of 2500 pixels by 2500 pixels. Members can Log in and Download! Otherwise, Join Now! A preview of the brushes are below.

sample

This new Premium Psdpack Pack was created by Grant Friedman of Colorburned and is available for Psd Premium Members to download today. Grant is the Associate Editor of Psdtuts+ and creates loads of professional quality Photoshop brushes on a regular basis. We’re excited to partner up with him on this release.

pack

Psd Premium Membership

As you know, we run a Premium membership system that costs $9 a month (or $22 for 3 months!), which gives members access to the Source files for tutorials as well as periodic extra tutorials, and Premium Packs like this one! If you’re a Premium member you can log in and download the tutorial. If you’re not a member, you can of course join today!


Read more...

New Tuts+ Site ‘Mobiletuts+’ Launched

We’ve been burning the midnight oil at Tuts+ HQ to bring you Mobiletuts+, the youngest member of the Tuts+ family. It’s all about quality tutorials for mobile developers – all mobile developers, regardless of preferred platform. Topics will include native development with the iPhone, Android, Windows and Blackberry platforms, cross-platform development with tools like Titanium and Phone Gap, and techniques for building mobile web apps and mobile accessible web sites with HTML 5. Visit Mobiletuts+ or read more after the jump.

Whether you want to create the next killer app or become a pioneer of the mobile frontier, we’ve got you covered! In addition to publishing top quality tutorials, articles, and Quick Tips, Mobiletuts+ will be the first Tuts+ site to offer regular multi-media updates on the hottest mobile industry news. We will also be publishing interviews with successful mobile developers to provide you with the most effective real-world development techniques and strategies.

“But I’ve never done mobile development before!”

No problem! Mobiletuts+ will grow with its users. Initially we’ll be publishing lots of content on the fundamentals, like our first tutorial: An Introduction to iPhone SDK Development. We’ll be hitting all the major mobile development platforms with our introductory content, then moving on to the more advanced stuff. If you’re a veteran mobile developer, stick with us! The advanced goodness is almost ready to rumble.


Meet the Editor, Mark Hammonds

    Mark Hammonds, Mobiletuts+ Editor
  • Like all our Tuts+ sites, Mobiletuts+ is helmed by an expert. Mark Hammonds is a software engineer, author, and entrepreneur living in the D.C. / Baltimore area.

    In addition to his work with OmniTI, where he develops high-performance web sites and mobile applications, he is also the co-founder and CTO of Somba Mobile and was among the first developers to publish applications in the iTunes App Store.


Contribute!

If you think you have the skills to create screencasts, written tutorials, articles or Quick Tips for Mobiletuts+ it’s easy to familiarize yourself with the guidelines and become a tutorial author. We’re hungry for user contributions and pay a negotiated USD rate for each tutorial, article or Quick Tip we publish. Submit your concept today!


Read more...

Quick Tip: Use Photoshop to Turn Day Into Dusk

Taking photos at night is not an easy task. Photos taken without adequate lighting often look dim or grainy; they typically don’t look the same as what we see with our own eyes. That is why it is sometimes easier to convert a daytime photo to night using Photoshop than it is to try to take the same photo in the evening hours. In today’s tutorial we will demonstrate a quick technique to make your photos look as if they were taken at night. Let’s get started!


Original Image

Before we begin, let’s take a look at the original image that we will be working from.


Step 1

Open your image in Photoshop. Now create a duplicate of the Background layer. Next we’ll be creating the filter stack which will help us preserve the picture’s details while darkening it. Now convert the duplicate layer to Smart Filters (Filter > Convert for Smart Filters) so that we can edit the filters whenever we need to.


Step 2

This image shows the Filter Gallery with a stack of filters in the lower right panel of the window. This is just an example of how a filter stack looks like – some of you probably didn’t even know that you can do this. We’ll be creating our own stack in a minute.


Step 3

Now, open the Filter Gallery (Filter > Filter Gallery) and we’ll begin making the filters stack. As a note, you could also do this by applying individual filters on the layer, stacking them in the Layers Palette, but I prefer to use this approach because I think it’s quicker this way, and probably because it has a lower impact on memory usage as well.

Next, make sure you clear the stack if you have used it before by clicking the Trash icon at the bottom of the stack panel until you only have a filter left in the stack.


Step 4

It’s time to get messy. For the first item in the stack, choose the Accented Edges filter from the Brush Strokes category. This will accentuate the picture’s edges, preserving its details while darkening. The values used are as follows: Edge Width: 2, Edge Brightness: 38, Smoothness: 5.


Step 5

Next, add a new item in the stack by clicking on the button next to the Trash icon you clicked earlier to empty the stack. This will duplicate the first filter and will be added above it. Now choose the Dry Brush filter from the Artistic category, and give this filter the following values: Brush Size: 6, Brush Detail: 9, Texture: 1. This will help us darken the photo.


Step 6

Finally, add a last item in the stack – Crosshatch from the Brush Strokes category, with the following values: Stroke Length: 9, Sharpness: 6, Strength: 1. This last item will sharpen the other two filters.

Right now, it doesn’t look very promising (check the image below), so we need to fix this. Make sure the smart filter layer is selected and from the Blending modes choose Linear Burn, and then give it a 40% opacity.


Step 7

Now it looks better, but it doesn’t look much different from the original. But after applying some adjustment layers, you’ll see that these filters have a big impact on making it look like it was really shot during the evening.

The first adjustment layer that we’re going to create is Brightness/Contrast. Give it a brightness of -50 and a contrast of 0.


Step 8

Next, add a Hue/Saturation adjustment layer with a saturation of -20 (the other two controls must be 0). Now add an Exposure adjustment layer with an exposure value of -0.45, an offset of 0 and make sure Gamma is set to 1.


Step 9

Wait, there’s something more to add. Add a Vibrance adjustment layer with a vibrance of +20 and 0 saturation. Finally, add a Levels adjustment layer, then select the Red level from the Levels dialog and give it the following values: 0, 0.91, 255. Do the same thing for the Blue level with these values: 0, 0.79, 255. The final result is below!


Additional Example

In this example I’ve used a value of 40% for the layer’s opacity. This value of 40% will be used for large images and landscape pictures (and I’m not referring to the page orientation). In case of a portrait or a small picture, you should use a value of 15%.

Before applying the effect.

After applying the effect.


Download the Action

We have provided the action for this tutorial in the Extras folder for this tutorial’s download which is available exclusively to Psd Premium Members.


Read more...

Create a Beautiful and Dramatic Scene With Photo Manipulations – Basix

Today we will learn a number of techniques to help you add drama to a photo manipulation. We will to do this by learning how to combine two pictures to create a picturesque background, how to draw long hair manually using Photoshop brushes, as well as how to add some adjustment layers to add dramatic effects to the final image. Let’s get started!


Resources


Step 1

Create a new file, size 1600 px wide and 2122 px high at a resolution of 300 pixels/inch. Paste field to new file.


Step 2

Add layer mask. Activate gradient tool. Draw linear gradient from black to white.


Step 3

Zoom in until you can see all the details. Paint unneeded background with black to remove it.


Step 4

Paste sky underneath field layer. The colors will not match the field so we will have to fix it. From the adjustments panel click Color Balance with setting shown below.


Step 5

Download the girl picture. Create new path and with pen tool draw path around her. Avoid selecting her hair. We’ll just recreate it in a few steps.


Step 6

Hit Cmd+Enter to convert path into a selection. Copy the girl and paste it into the new background. Press Cmd+T for transformation and while holding shift drag its corner until she is the appropriate size.


Step 7

Before we proceed with this tutorial, we will need to fix some small details. She has transparent sleeve and it has to reveal some background behind her. To do this, add layer mask, select soft brush with low opacity (10-20%), then paint it with black.


Step 8

Activate field layer. Select some field behind her. Hit Cmd+J to duplicate it to a new layer. Then hit Cmd+shift+] to move it to the top layer.


Step 9

Add a layer mask to the new field. For masking grass, Photoshop has a very useful brush in its default set, named Dune Grass. So, right click and select it. Remove the check mark in front of Color Dynamics.

Next, make sure your foreground color is set to black and layer mask is selected. Start painting until the girl looks like standing in the middle of the field.


Step 10

To strengthen the illusion that the girl is standing inside the field, it’s a good idea to have something in front of her. Change our brush to standard round brush, paint some flowers with white to reveal it.


Step 11

Now let’s draw her hair. But before doing that, make sure the layer mask is active. Paint her hair with black using a soft, low opacity brush until it is transparent.


Step 12

Load the hair brush set. This set consisted of some long premade hairs. Using the brush tool, Cmd+click her hair to sample its color. Open brush panel (F5), click and drag the inside preview box to rotate brush tip. Once you’ve found perfect size and position click to draw an instant long hair. To get a natural color, be sure to sample various color from the hair.

Repeat this step until you have enough hair.


Step 13

After step 12 you may find that the result isn’t entirely realistic. If you look closely you may find that there are repeating objects in her hair. This is a common problem when using premade brushes. The best way to avoid this is by drawing some hairs manually.

Grab the hair brushes set from here. Lower your brush opacity to 15-25%. If you use a tablet, then that’s a good thing. You can activate its Pen Pressure from the Brush Panels.

Manual painting is not easy. It may help to work with a lot of layers. That way you can always delete layers that you don’t like. Below are the steps I took while creating the hair.


Step 14

Now, we need to add some lighting to the girl. To do this we’ll use non-destructive dodging and burning. Hold cmd and click New Layer icon. Choose Use Previous, Mode: Overlay, and Fill with.

Activate burn tool, set opacity to 20% and start painting to make her darker. Do the same with the dodge tool for opposite effects. Remember, if you hold alt while dodge tool selected, then you’ll have burn tool. Same thing happen to burn tool.


Step 15

Now, I’ll add dark border around the image. Hit ctrl+A to select all. Click Edit > Stroke. Use very large width and click OK. Soften the border using Gaussian Blur with a very big radius.


Step 16

Hit ctrl+T. Hold ctrl and drag its corner until you find nice lighting.


Step 17

To add fake light draw a poligonal selection and fill it with white. Add very big Gaussian Blur and lower down layer’s opacity to 30%.


Step 18

Draw the girl’s shadow on the field.


Step 19

Grab the butterfly set. The butterflies are already in a transparent png file, so you just need to select it and drag it to the image. Resize it to match its proportion. Don’t forget to add shadows for a realistic look.


Step 20

Load the floral brushes. Try to experiment with the brush shape. Combine them to get a unique shape like I did here, then add some text in the English font found from dafont.


Step 21

For final adjustment, select the sky layer and use Brightness/Contrast to raise its Lightness. I also added an adjustment layer Photo Filter with a warming filter on top of the image.


Conclusion

I hope you have enjoyed this tutorial and learned something new. You can view the final image below or view a larger version here.


Read more...

Interview With Fantasy Artist Skam Works

Artist Maksimilijan Gecevic, better known as Skam, is a master of producing fantasy artworks. His visuals show vivid events unfolding in practically every illustration he creates. In our interview Skam talks about the benefits of being in a design collective as well as some of his upcoming projects. So let’s get into another interview with a great artist.

Q Welcome to Psdtuts+, please introduce yourself. Could you tell us where you’re from and how you got started in the field?

Hello, glad to be here! My name is Maksimilijan Gecevic and I am from Zagreb, Croatia. I went to a School of Applied arts and I’m currently finishing Faculty of graphic arts in Zagreb. Before I started doing digital artworks I was more into traditional techniques as it was mostly what we learned in school; the basics of traditional art. I got more involved in digital art in college where I started to combine those two techniques but later I found myself creating digital art and graphic design. It all started when I was creating some album covers, posters and logos for fun. But now I rarely sit and draw something traditional. I still draw sketches or doodles for some digital works, and knowing the basics really helps to improve digital artworks later on.

Q All your art has amazing imagery in it, where do you get the inspiration to create scenes like “Evil” and “Dreaming?”

Well, it depends. I get inspiration from everywhere, sometimes ideas just pop into my head. I see a movie or read something that gives me an idea. I like to think of a background story for every piece that I make, so basically, I do as much daydreaming as possible so I can come up with great ideas.

Q You are a member of SlashTHREE a great design collective, in your opinion what are the positives of joining a design collective and submitting your work. Has it benefitted you in any way yet?

I joined SlashTHREE about a year ago, and I have definitely improved since then because the artists there push each other to work on a higher level, giving each other critiques, pointing out things you might not notice, and they don’t let up until you show some progress. But seriously, joining collectives are great for artists to improve and grow. In the end, it gives more exposure to your work. So yeah, I definitely benefitted from it.

Q “Devotion” is a beautiful piece that was featured for SlashTHREE’s latest pack. Please talk about how you made this incredible illustration and what this piece is showing us.

With Devotion, I was inspired by couple of movies I saw with aliens so I wanted to create something with that theme, but in a way to show different kinds of connections, or call it relationship between humans and aliens, in a way I see it if something like that would ever happen. Basically the story itself is up to viewers to imagine, but one of the ideas was actually a love story behind it all. It was created as half manipulation and half illustration because I’m trying to include more painted and illustrated elements to my works so they could be less "cold“ like when they are 100% manipulated, but still on another level when there is some mixed media in it. The ship was mostly painted with some manipulated details, while cityscape was a stock, same for the girl which was exactly what I was looking for in this piece so in the end it turned out like I wanted to. Glad you liked it!

Q All of your fantasy scenes look absolutely seamless with the photo-manipulation techniques. Talk a little about what you put into them when making these illustrations.

I try to include both manipulated and painted elements in my work and blend them together in the end. The key to making these illustrations work is the details. Correct lighting is very important and it’s something that you can’t really learn from a tutorial; you really have to trust your own eye and make those decisions on your own. It is really important to learn, observe, and explore.

Q What plans do you have for the future of your graphic design career? Any upcoming projects you would like to talk about?

Right now my main goal is to finish college and create as many pieces as possible. I would love to make some kind of art book in the near future and I am working on some projects that are still in preproduction for a computer game but it’s still a bit early to make any announcements at this time. A bit further in the future, I hope to have my own design studio and do what I do now but I suppose we shall see how that goes.

Q Are there any specific techniques you use when designing that you would suggest to someone who is starting out in the same field as you?

I can’t say that there are any specific techniques that I use but I think the most important thing that any designer can do is pay attention to details, highlights, as well as depth of field; which can bring a new dimension to a piece. My best advice to a young designer is to experiment and search for tips on their own. When create something, feel free to make things your own way because that is what will become your signature.

Q Thanks again for providing Psdtuts+ with this opportunity to interview you. Any final thoughts for our readers?

My pleasure, and thank you for having me! Thanks to everyone for reading this and I hope that I have inspired at least some of the young designers out there. Keep working, don’t rush, don’t give up and maybe we can collaborate on some projects in the future!

Where to find on the Web

Read more...